
Notion Finance Tracker | 2024 Tutorial + Free Template
Notion Finance Tracker, Made Easy
If you're looking for a simple and effective way to track your personal and/or business finances, Notion is a great option. Notion is a powerful productivity tool that can be used for a wide range of purposes, including tracking your finances.
In this article, I’ll show you how to build your own aesthetic Notion finance tracker, step by step. We'll also provide you with a free Notion template that you can duplicate to get started right away.
Why Use Notion for Your Finances?
Notion is a great choice for tracking your finances because it's highly customizable. You can create your own finance tracker that's tailored to your specific needs and preferences. Notion also makes it easy to organize your finances, so you can see all of your accounts, transactions, and budgets in one place. If you're a freelancer, entrepreneur or startup, you can also link your Invoices database to your Finance Tracker system.
How to Build Your Own Notion Finance Tracker
Here are the steps to building your own Notion finance tracker:
Setup
Set up your Notion page: Create a new page in Notion and call it "Finance Tracker." This is the parent page for all your databases.
Build your expense tracker

Add a new Notion database to your page. Select “Table” view and name your database “Expenses”.
Then, add the following properties:
- Name (title): it’s the name that appears on your bank statements
- Amount: set up the currency of your choice (click the “123” button on the left)
- Date: set up the date format (click the date, then click “date format & timezone”)
- Type: create different expenses categories (subscription, taxes, freelancer, etc.)
- Notes: if you want to add notes to specific transactions
Build your income tracker
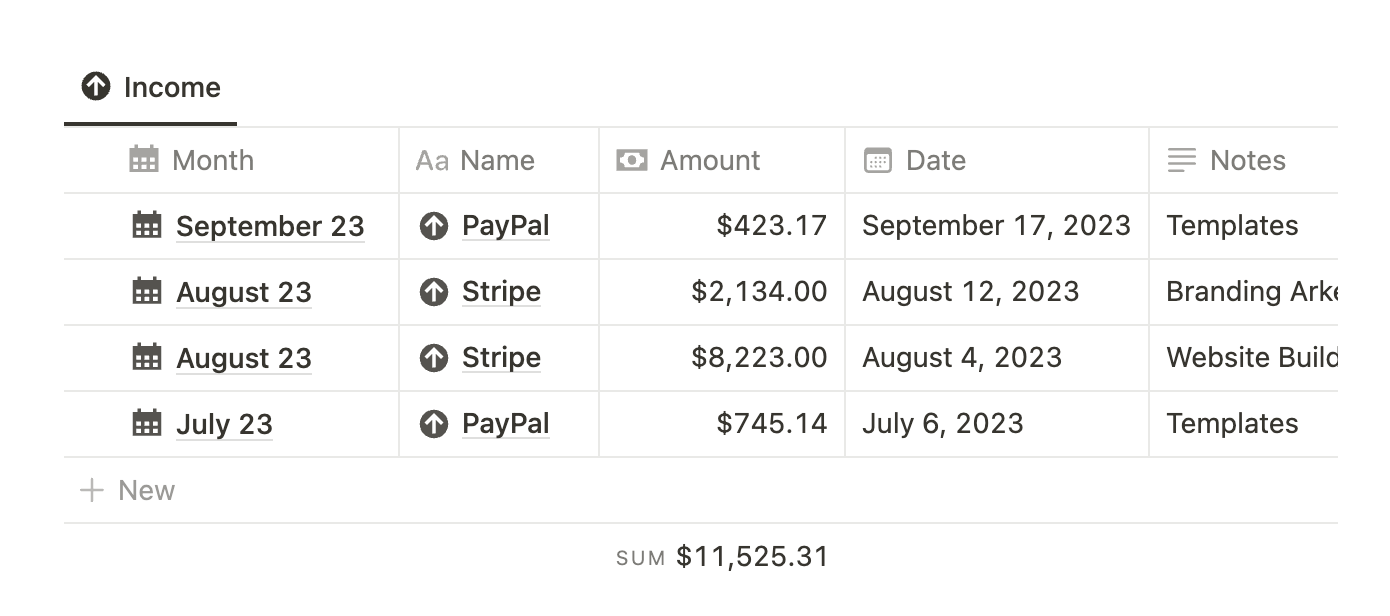
Add a new Notion database to your page. Select “Table” view and name your database “Income”.
Then, add the following properties:
- Name (title): it’s the name that appears on your bank statements
- Amount: set up the currency of your choice (click the “123” button on the left)
- Date: set up the date format (click the date, then click “date format & timezone”)
- Type: create different income categories (salary, freelancing, digital products, etc.)
- Notes: if you want to add notes to specific transactions
In the content of each income or expense cards, you can add notes to give more details about the transaction.
Monthly reports
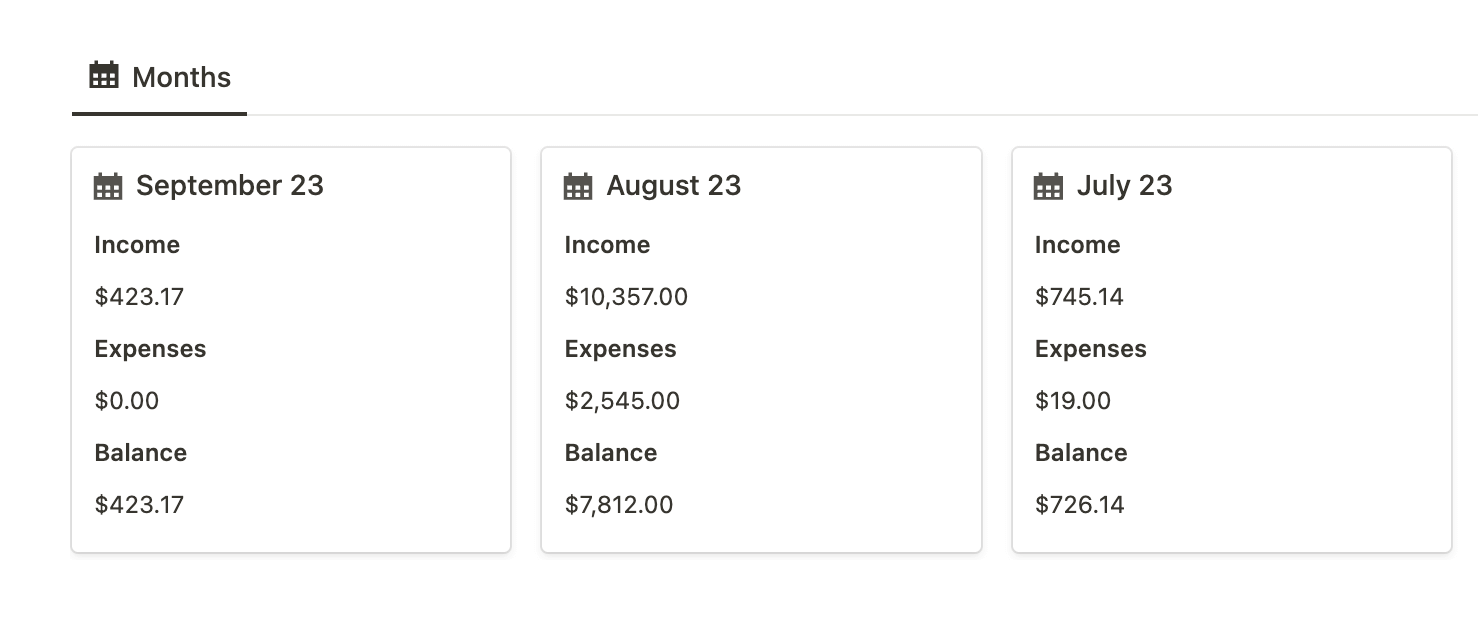
Add a new Notion database to your page. Select “Gallery” view and name your database “Months”.
Then, add the following properties:
- Relation to Income (2-way relationship)
- Relation to Expenses (2-way relationship)
- Rollup that gets the Sum of all Income
- Rollup that gets the Sum of all Expenses
- Balance formula that calculates the difference between Income & Expenses
- Labels (text): Income, Expenses & Balance
- Formulas that get the data from the Income & Expenses rollups (they will be used for the Years database, but should be hidden in the Months database)
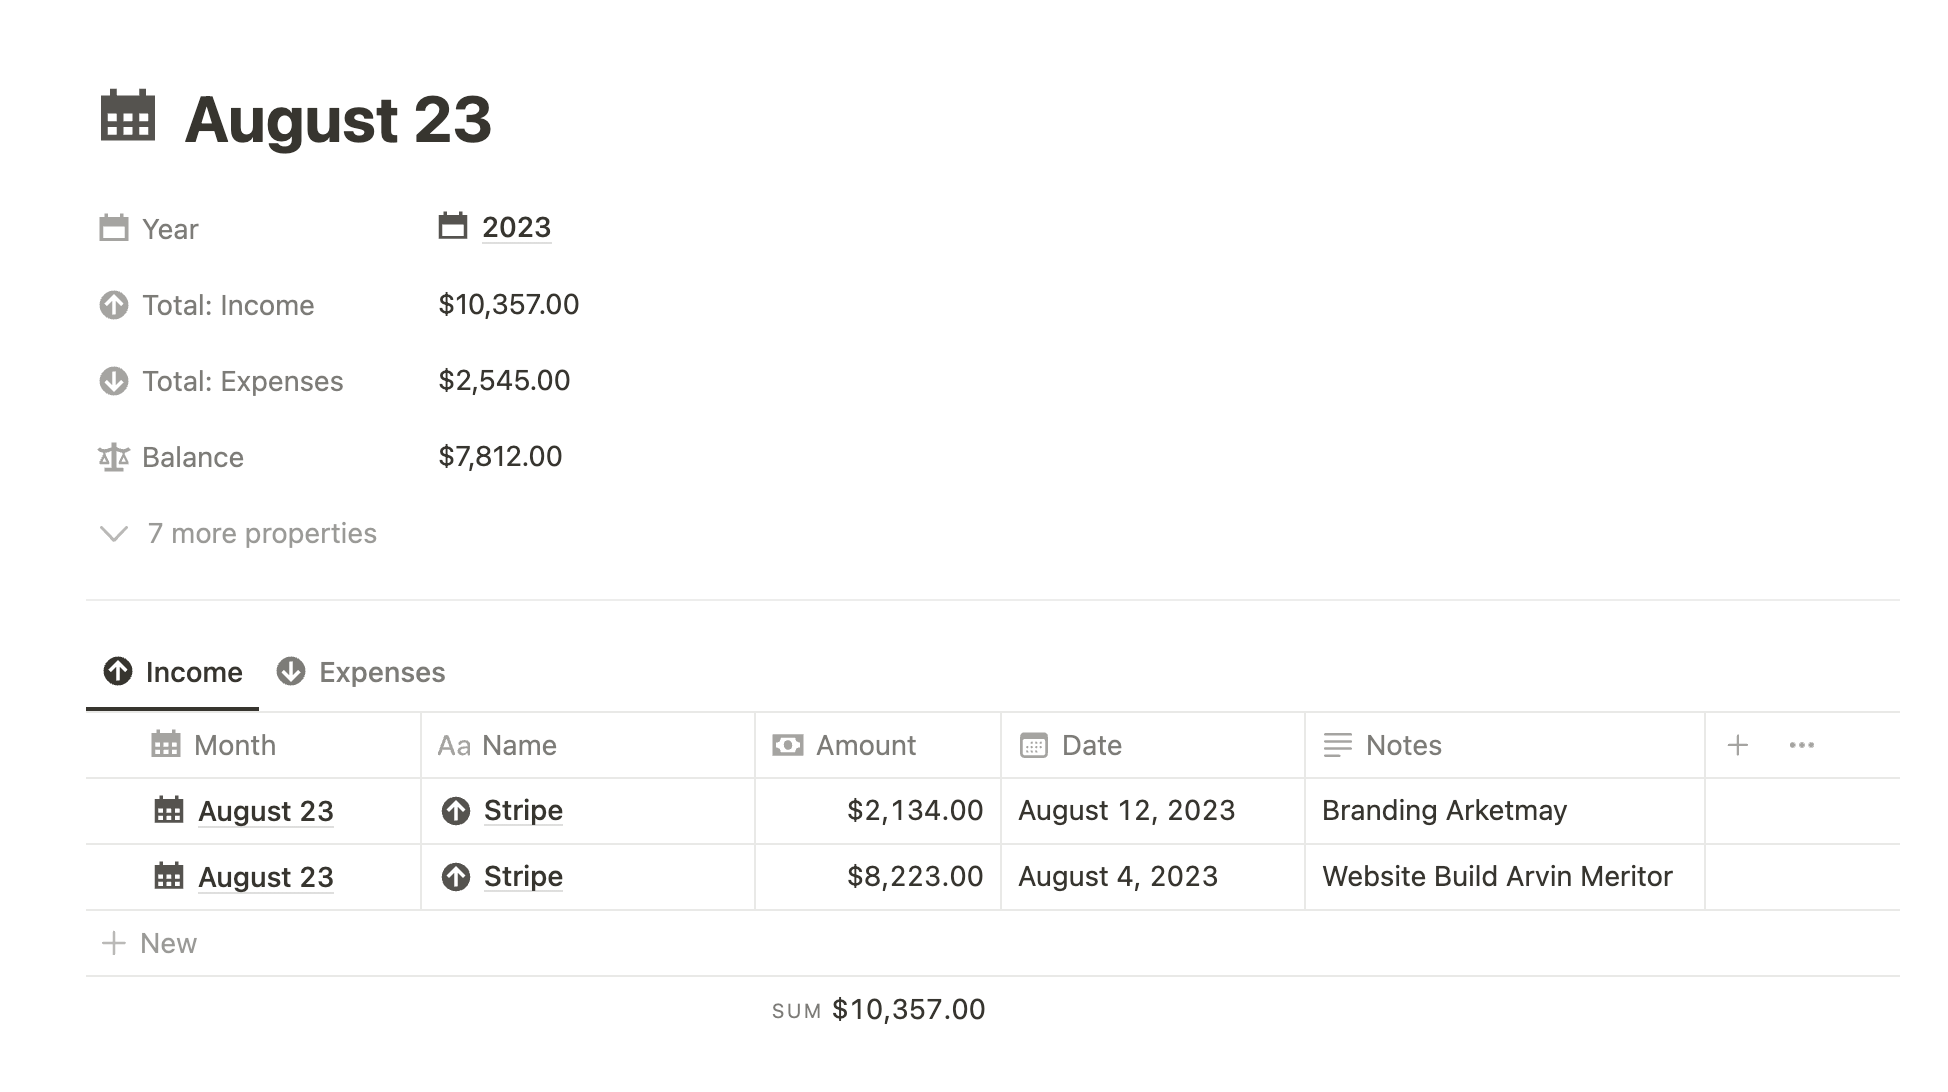
Now, go to the database templates, and create a new one:
- Add a linked view of the Income database
- Filter that view by “Month” contains “Name of the current template” (”Untitled, if you haven’t changed it)
- On the same block, add a new view of the Expense database. Apply that same filter.
- Fill out the Labels properties such as “Label income” equals “Income”, “Label expenses” equals “Expenses”, & “Label balance” equals “Balance”
- Add this template to be used by default
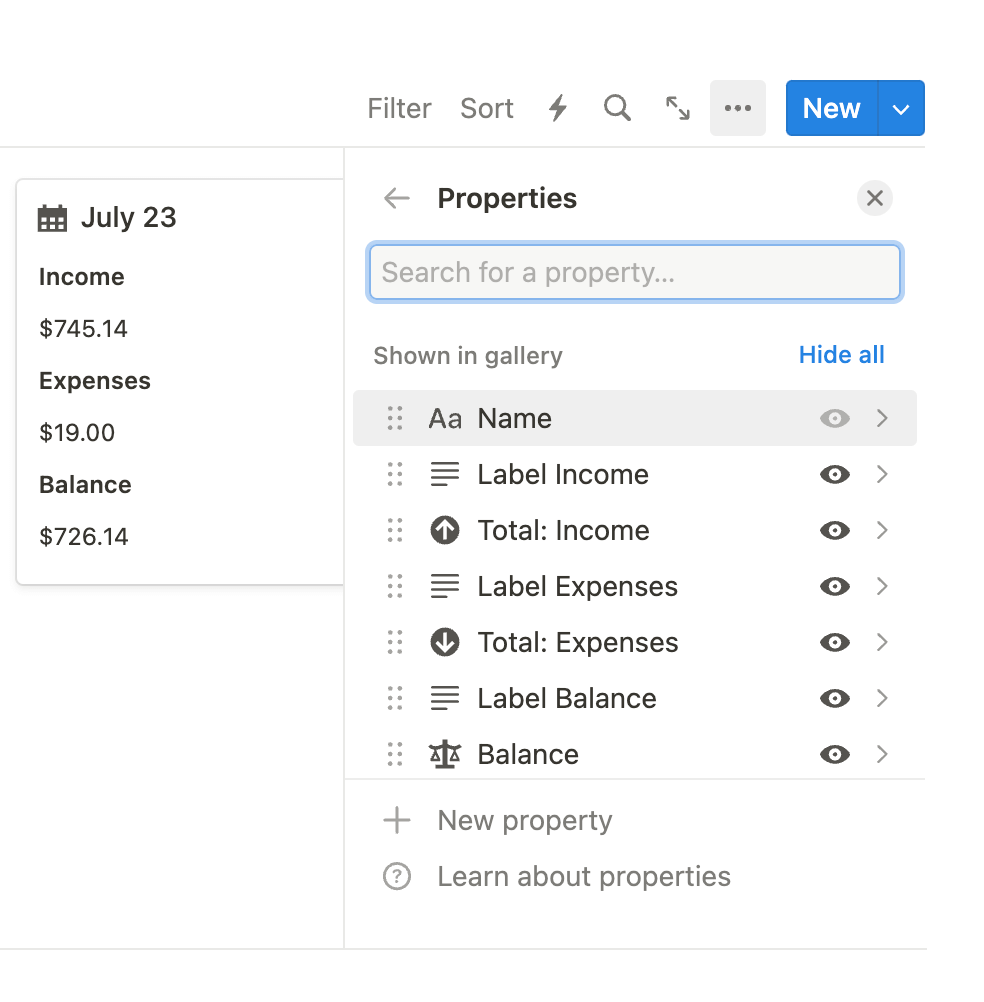
Finally, you need to select which properties you want to display in the gallery view:
- In the database settings, set “Card preview” as “None”
- In the properties section, display in that order: Label income, Income, Label expenses, Expenses, Label balance, Balance.
Yearly reports
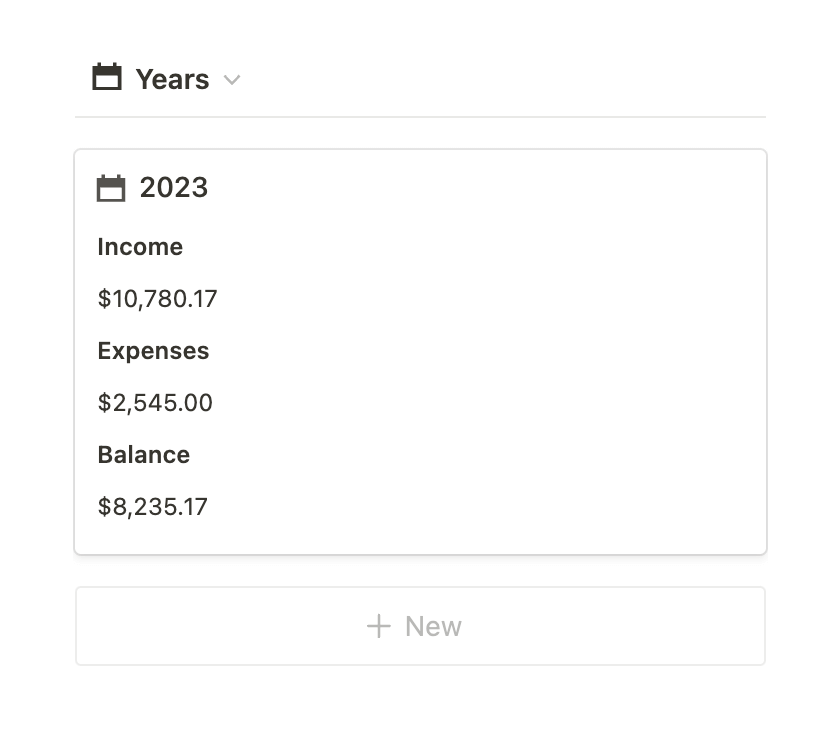
Replicate the same process as for the Months database, with a few exceptions:
- Add a relation property to Months instead of Expenses & Income
- Extract the total sums of Income, Expenses & Balance using rollups
- No need to create formulas out of the rollups, as we're not going to aggregate this data into another database
- Don’t forget to add the same labels
Build your own tracking dashboard
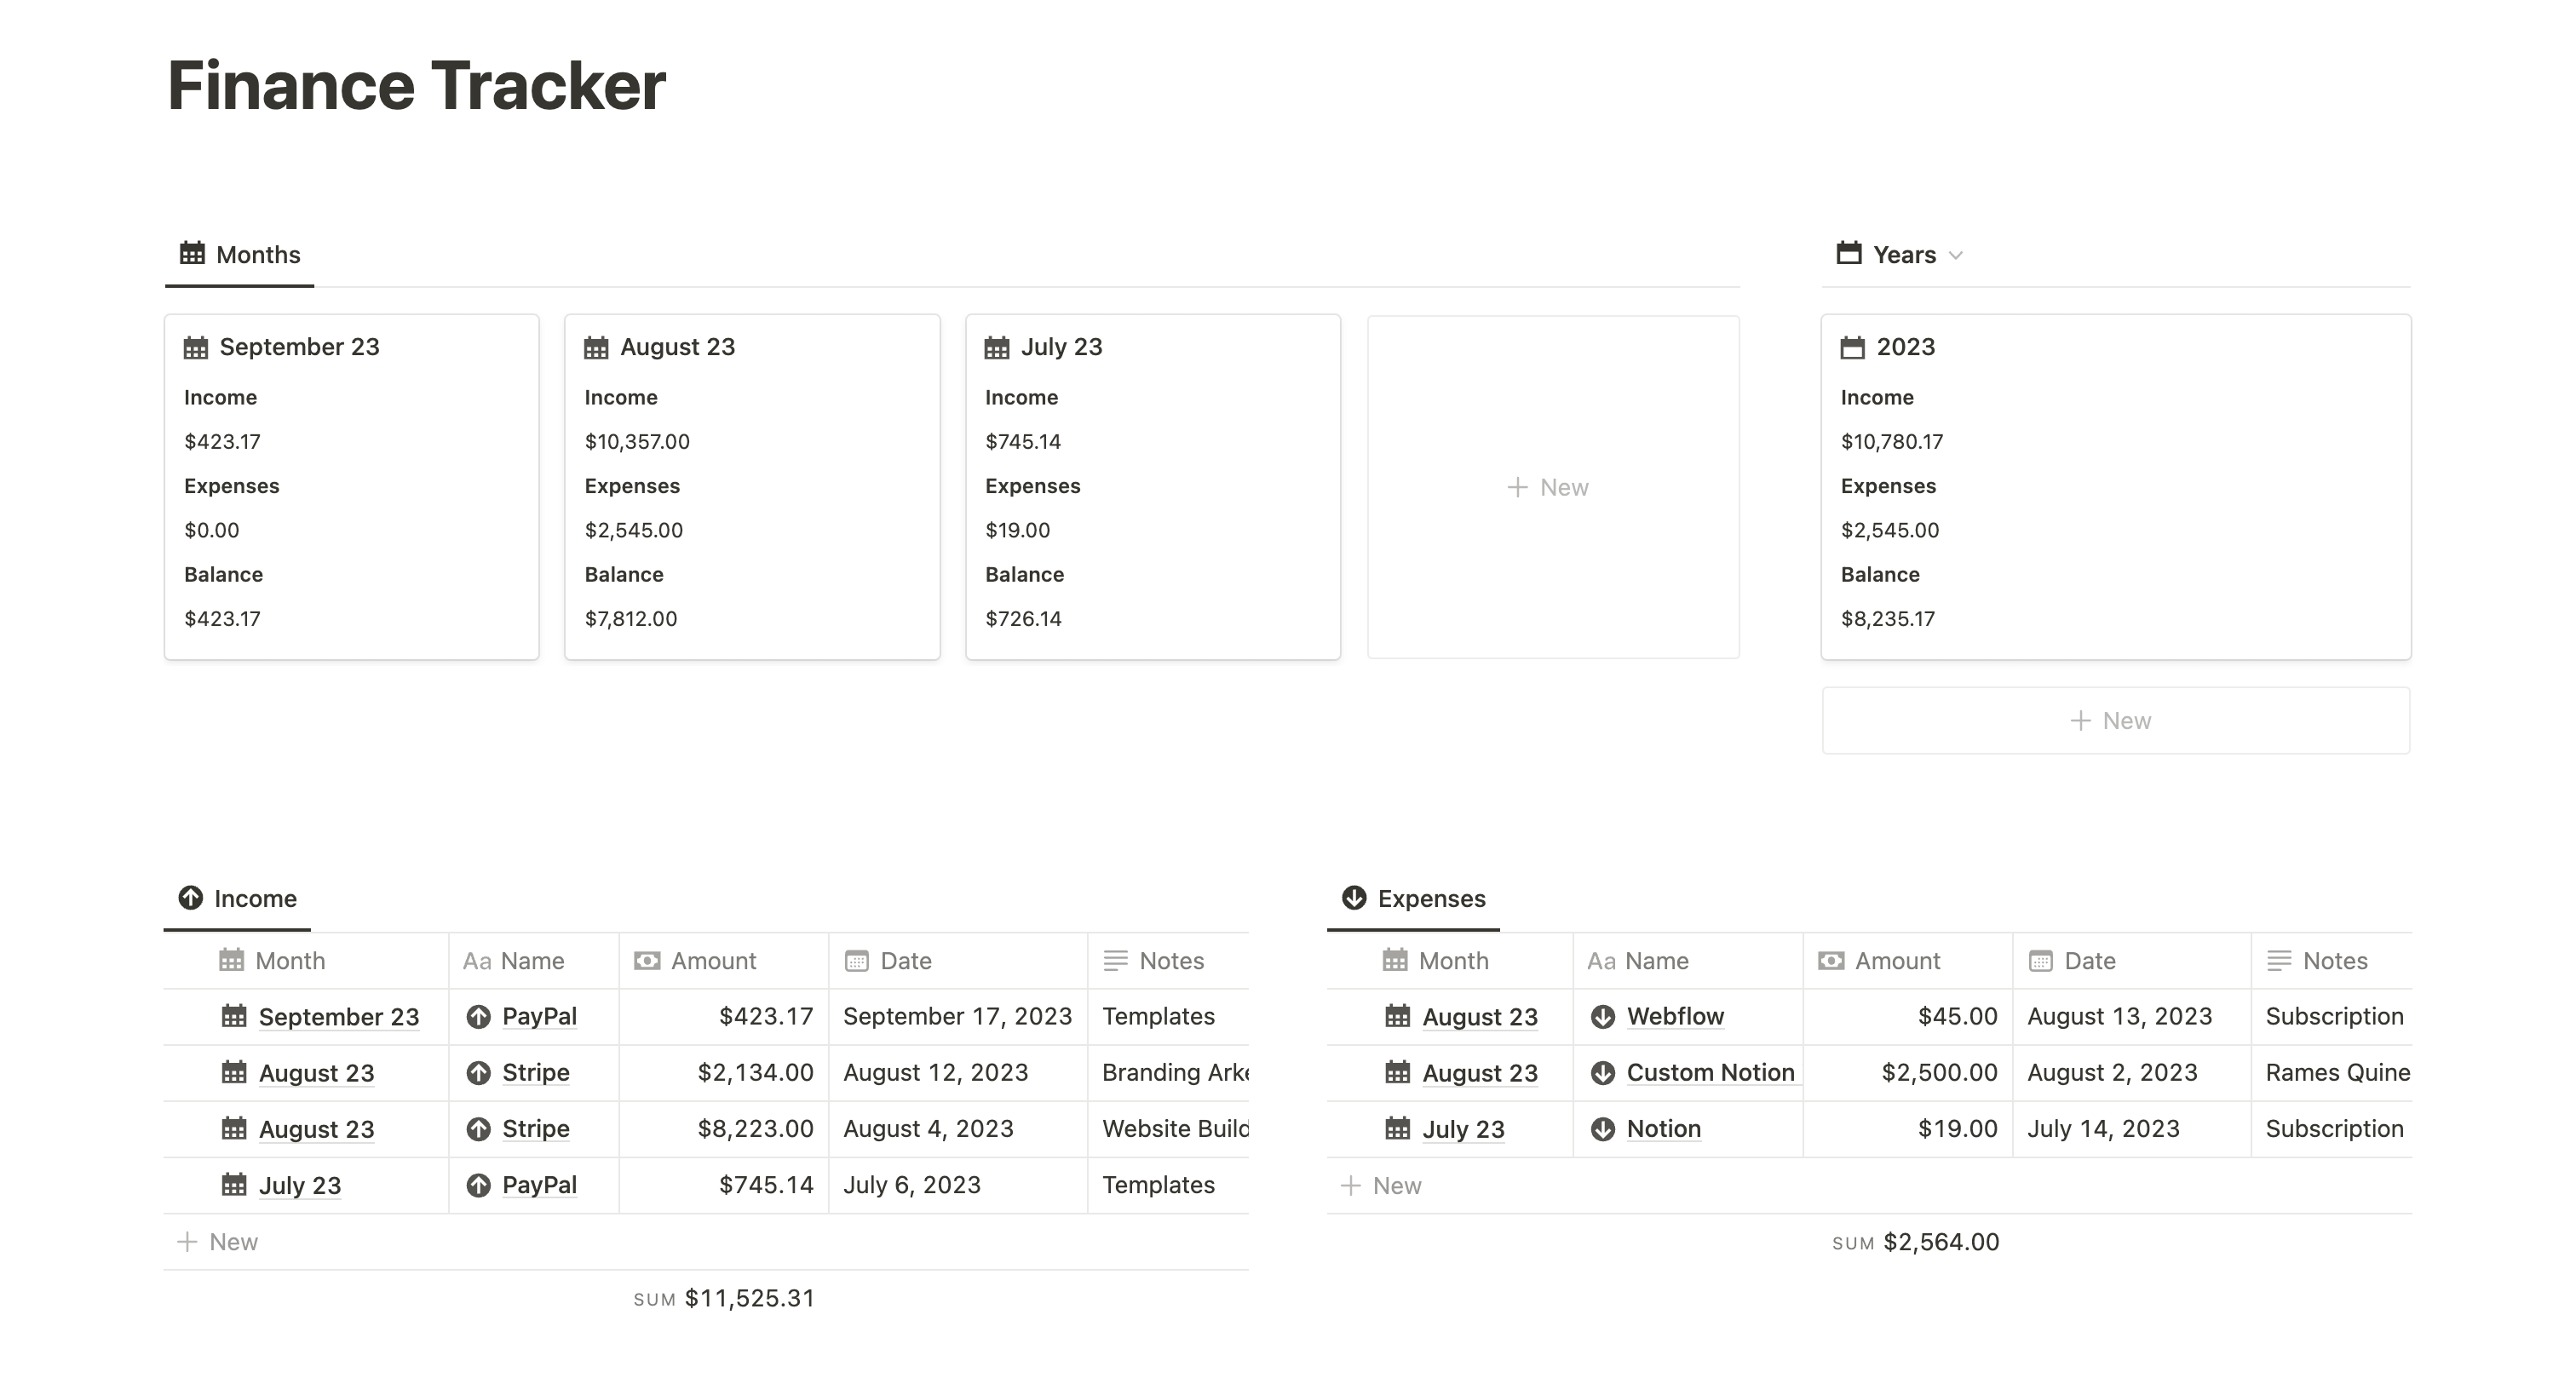
The layout that I found works the best, and that is aesthetic, is using columns to separate these four databases.
First, add two columns and drag and drop the Months database to the left, and the Years database to the right. Drag the column to right as you’ll need more space for Months than for years.
Then, add two new columns beneath: drag the Income database to the left, and the Expenses database to the right. Leave them bot the same space as their length is quite the same.
That’s it! You now should have a cool-looking dashboard.
Free Notion Template
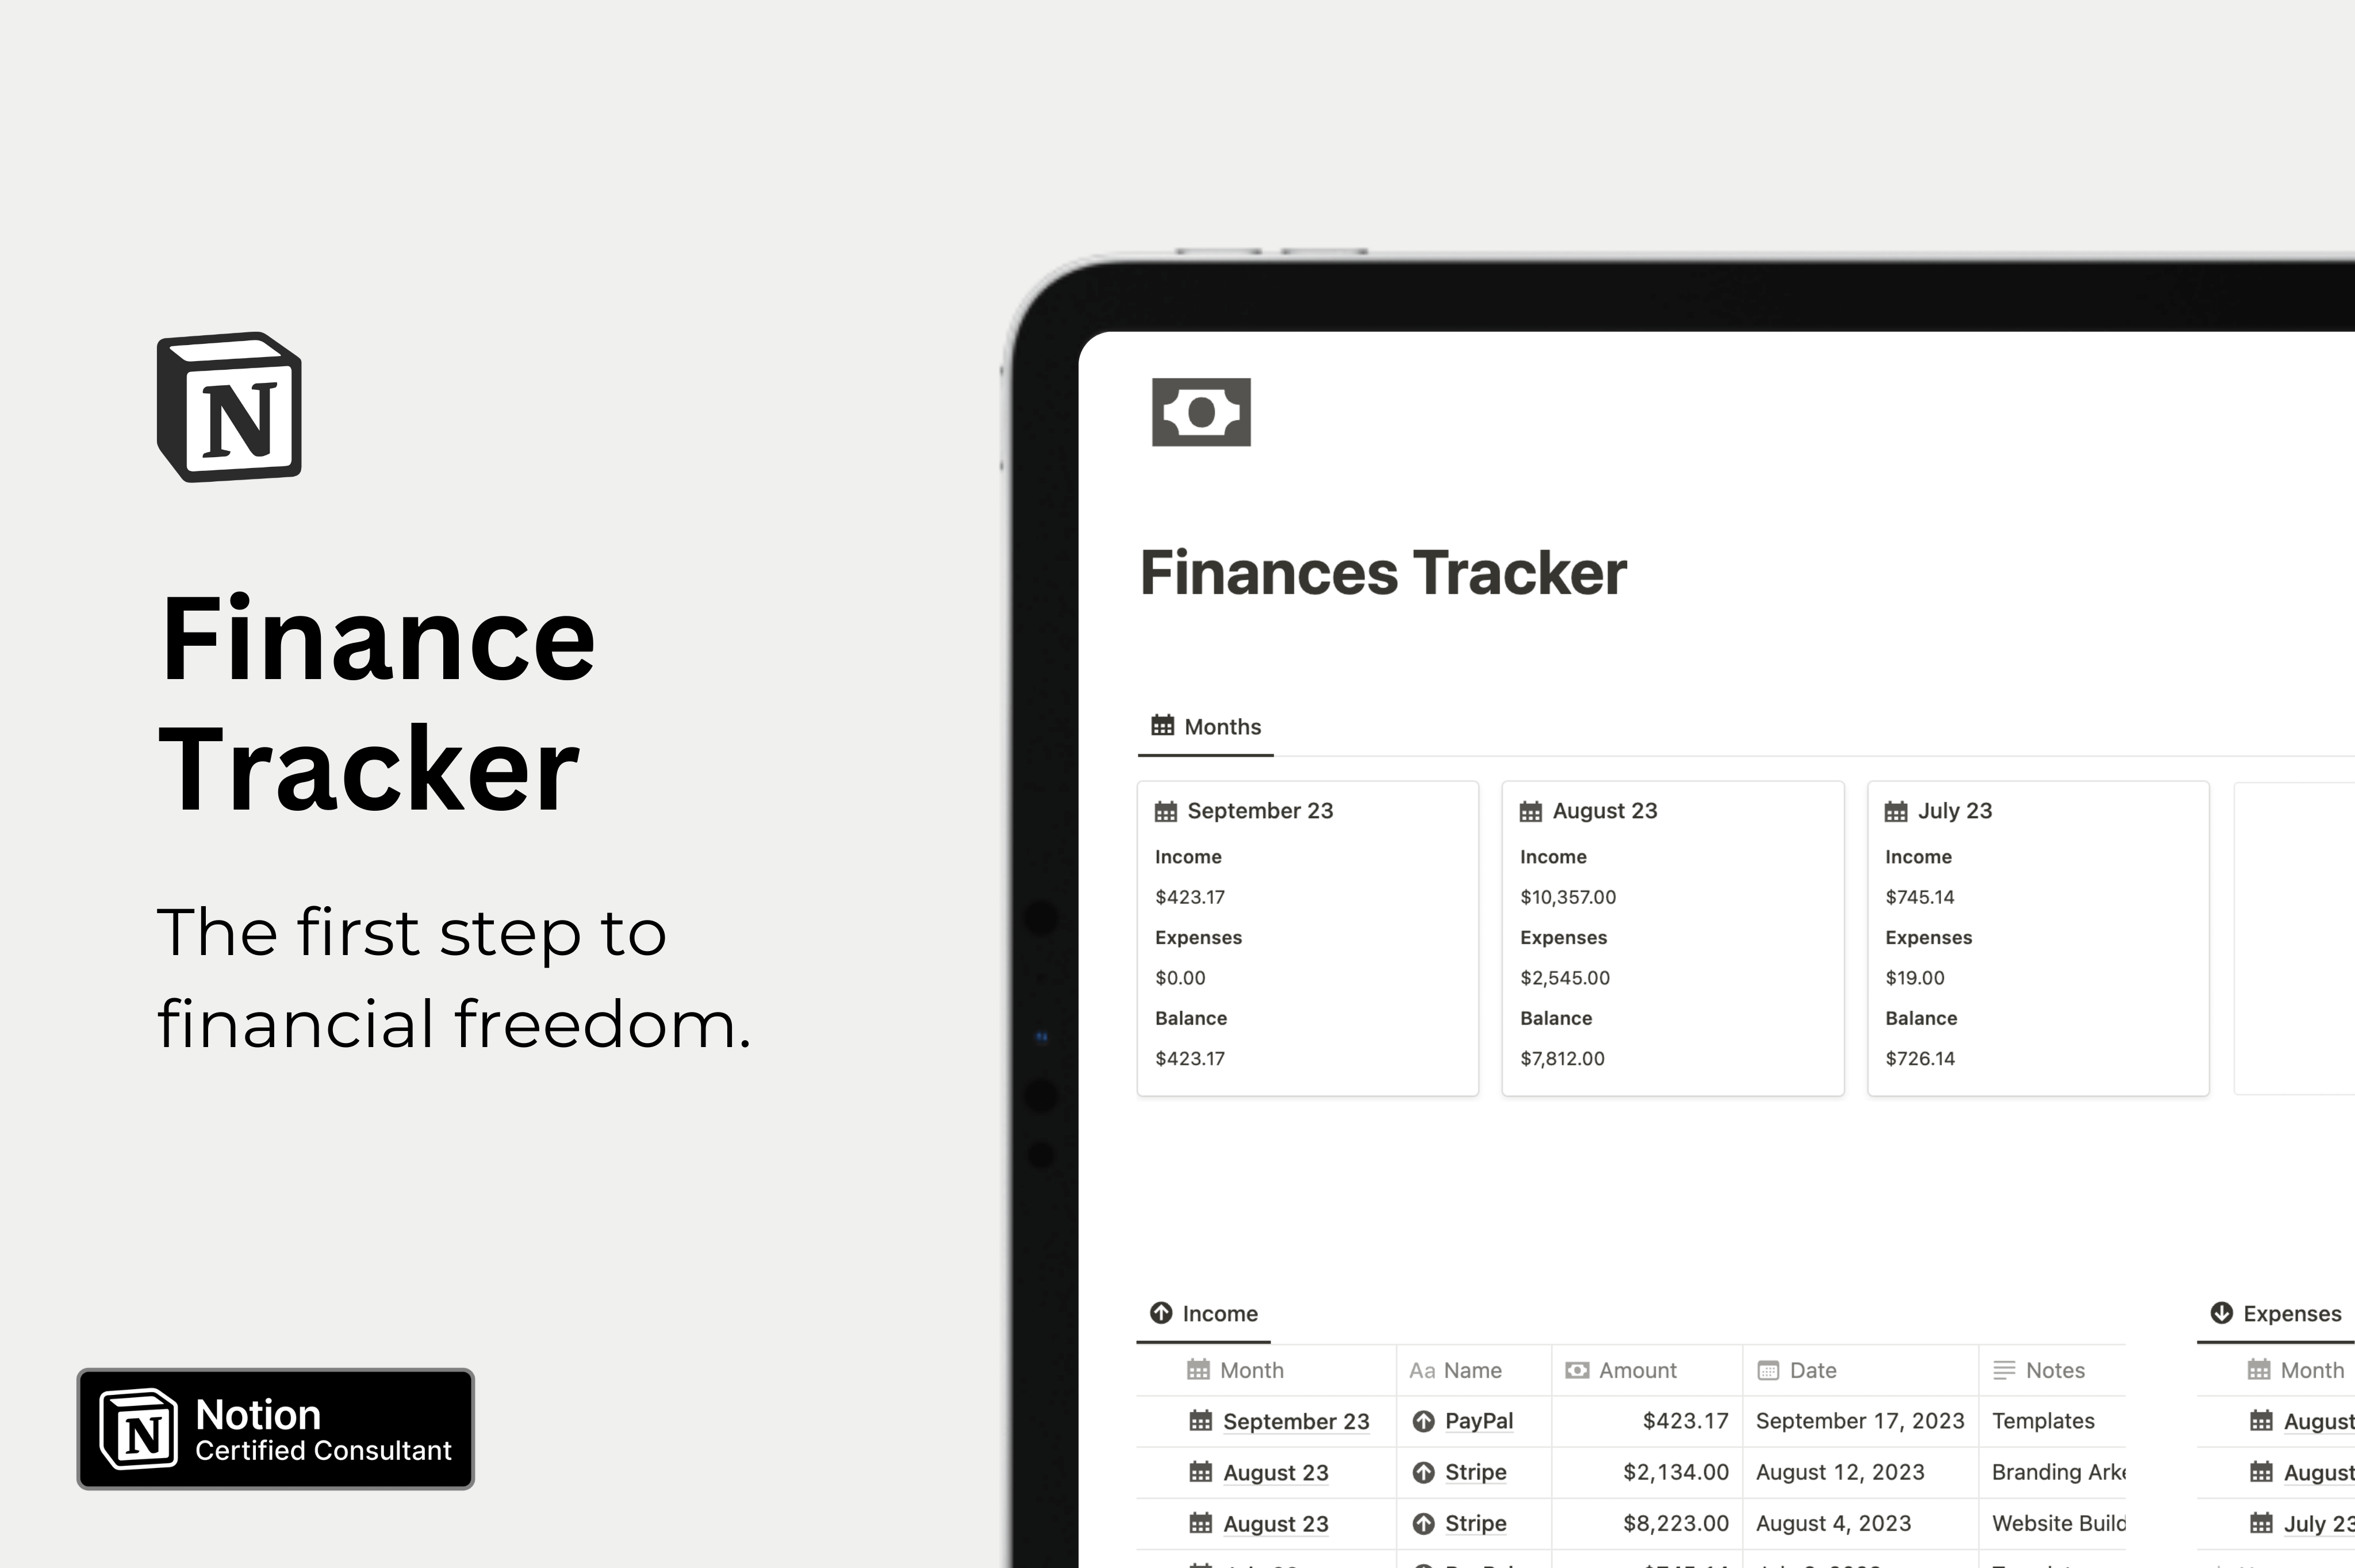
To help you get started, I’ve created a free Notion template that you can use to manage your life and business finances with ease. Simply click the link below to download the dashboard and duplicate it into your Notion workspace:
Notion Finance Tracker Template
Conclusion
With Notion, tracking your finances & managing your money has never been easier. By following the steps above, you can create your own customized, aesthetic finance tracker that will help you stay on top of your finances and achieve your financial goals.
If the process feels too complicated, you can still use the free Notion template I provided!
Start now & create your Notion account 🙃
(#NotionPartner)
Notion is a great choice for tracking your finances due to its high customizability. It allows you to create a finance tracker tailored to your specific needs and preferences. Notion also enables you to easily organize your finances, giving you a comprehensive view of all your accounts, transactions, and budgets in a single place. Notion is particularly useful for freelancers, entrepreneurs, or startups as it allows the linking of your Invoices database to your Finance Tracker system.
To build your own Notion finance tracker, start by setting up a new page in Notion called 'Finance Tracker'. Build separate trackers for income and expenses by adding new Notion databases to your page, each having specific characteristics such as Name, Amount, Date, Type, and Notes. You can also create monthly and yearly reports by adding new databases and applying the right properties. Finally, you can arrange all these databases into a dedicated tracking dashboard. Follow the exact steps provided in the article for a detailed guide on each step of making a Notion finance tracker.
Yes, a free Notion template is provided in the blog post to help get you started with managing your personal or business finances. This can be duplicated into your Notion workspace with ease. Follow the provided link in the article to download the template.


